Trying again

Blogging is a funny thing. It’s a form of catharsis, it’s a humble brag, it’s an attempt to be witty or intelligent or profound or all three. Writing my thoughts as if I have some sort of authority to say something important makes me feel self-conscious, as if I’m pretending to be something I’m not. But these large waves of insecurity are always studded with the reminder that practice makes results all the better, and this whole thing called “blogging” won’t get any more less weirder by thinking about it and weighing its merits.

So I’ve decided to write again. With the hopes that it will spark some sort of creative revolution that inspires me to do more with my life and discover new things by trying to articulate my thoughts and desires. I guess that has always been the theme of my posts, however scarce and scattered they may be. What’s that idiom about repetition again? Oh, a broken record. Wow that actually came from my mind without the help of Google. What a miracle.

Ok, so here are my rules. I’ll blog once a week, minimum. Maybe I’ll even post photos and start posting recipes again. I do miss that. And there’ll be no pretension, no hesitation — just attemptingly witty, intelligent, profound words that come from my own mind and heart, or so I will try.

Roasted Asparagus and Garlic Soup

IMG_2793

Yes, yes, spring is on it’s way and it’s supposed to be time to put away the heady soups and stews, but when you have a healthy bunch of asparagus you don’t have the confidence to finish alone this is what happens. Besides, what could be wrong about a cozy bowl of soup on a late Sunday afternoon? I found that there is nothing, nothing at all.

Ingredients:

A generous bunch of asparagus (look at photos for estimated proportion)
1 small head of garlic
1/2 cup vegetable stock
3 tablespoons heavy cream
1/2 cup parmigiano-reggiano (the real stuff)
1-2 teaspoons olive oil
Salt and pepper

Directions:

1. Remove woody ends from asparagus: take each end of asparagus and bend until the asparagus snaps. The stem will break right where the woody part ends and the fresh asparagus begins. If it seems like you’re wasting a lot of asparagus, just try the ends – even if they look green and healthy they will taste distinctively bitter.

IMG_2724 IMG_2733

2. Slice the head of garlic in half crosswise (horizontally), keeping the peel on.

3. Rinse trimmed asparagus in water. Then make a little tin foil box (see photos below) for the asparagus or place them on a sheet pan. Drizzle on a little olive oil, salt and pepper and toss to coat. Add the two halves of garlic, cut side up, into the tin foil box or onto the sheet pan.

4. Roast for 20 minutes at 500˚F. Your oven may take less time, mine is pretty shabby. Toss the asparagus around half way through.

IMG_2769

IMG_2776

5. While vegetables are roasting, grate 1/2 cup parmigiano-reggiano.

IMG_2751

6. Blend together roasted vegetables and 1/2 cup vegetable stock for about a minute (I used my Magic Bullet). There shouldn’t be any chunks or pieces but it’s okay to have little, teeny bits in the soup.

7. Heat up blended vegetables in a pot. Pour in 3 tablespoons of heavy cream and parmigiano-reggiano. Mix together until cheese is melted and everything is incorporated.

8. Taste for seasoning and add salt and pepper accordingly.

9. Serve hot with a drizzle of olive oil (about a teaspoon).

IMG_2794

On what it means to be “home”

IMG_4132

It always feels a little bit lonely when I return to school. Entering an empty apartment and having no one really to call up and hang out with is a sobering experience. For some reason, it happens to me often, despite having roommates. When I’m back at home, I never feel the same sense of loneliness even as I spend days by myself cooped up in my room. I suppose that is the blessing of sharing a house with your family – that consistent sense of home, of company, reminded to you by the leftover plates lingering from breakfast, my brother’s video games strewn across the family room floor, the half-filled laundry basket at the top of the stairs. Even when there’s no one home, I never feel truly alone. It is a little different in an apartment with roommates.

Even beyond “home,” I realized during finals week in December that I didn’t really have many friends to call up and hang out with at my whim. Once the bustle of daily classes were gone, my days became empty, boring, lonely. In some ways, I suppose that’s a good thing – having solitude. It teaches you things, a lot of things, about yourself, about life, about how things are and about how things could be instead. But a little too much of that starts wearing out your soul and the stamp of loneliness begins to look more permanent than ever. I wonder if my life will ever change and one day I will have friends to call on just for fun, just because I’m bored. This absence in my life probably causes my dependence and attachment to Chris in a strong way – he is the only constant, the most reliable source of company, affection, attention. As I write this I’m realizing that maybe it’s a little pathetic of me. And that I should probably just grow up and move on. As Peggy’s mom said to Peggy in Mad Men after her daughter revealed she wanted to move in with her boyfriend, “If you’re lonely, get a cat.”

Creamy Tomato and Tuna Penne (Recipe adapted from foodwishes.com)

Does this recipe sound a little unnatural to you? I didn’t think it was that weird until a few friends said it was. But I promise you this is one of the most delicious pasta dishes I’ve ever made. Can you believe it? My “most delicious pasta,” made from canned tuna and tomato soup? I’m not sure if that’s really a good thing…but nonetheless, if that doesn’t give you a little faith to make this pasta then I don’t know what will. It’s super cheap and super easy to make – perfect for a big batch dinner for company.

Ingredients:

6-7 ounces of canned tuna (or preferably tuna in a jar packed in olive oil)
4-5 tablespoons of olive oil (if not using jar tuna described above)
3 cups of good quality cream of tomato soup (I used Pacific Organic Creamy Tomato Soup, found at Whole Foods)
14 and a 1/2 ounces of penne
3 cloves of garlic, minced
A big pinch of dried oregano
A big pinch of red pepper flakes
Two big handfuls of fresh arugula
Freshly grated parmesan

Directions:

1. Sauté tuna, minced garlic, oregano, and red pepper flakes in olive oil until the garlic becomes fragrant. If using canned tuna, used 4-5 tablespoons of olive oil, if using tuna packed in oil, use all the olive oil from the jar.

IMG_4124

2. Then, pour in the tomato soup and let simmer until the sauce thickens a bit.

3. Add in the pasta and arugula and toss together gently until the sauce has coated the penne and filled in the tubes. The arugula will naturally wilt in the heat as you do so.

IMG_4131

4. Serve with a generous grating of fresh parmesan (not the pre-packaged stuff!)

IMG_4141

Cheddar Biscuits

IMG_0207

I realized today that I have reduced my blog to writing posts for the readers and not myself. Getting a few views from Facebook can only be gratifying for so long. So, I’m going to start writing for myself (and no longer post on Facebook). Stop filtering all the honest things about my feelings and my life, and talk about all of it. And this post, I suppose, is unnecessary, and I should simply start writing the way I want to without any announcements, but then again, I’ve promised myself to regain this blog as my own and I know that I need something like this to motivate myself. I’m hoping that by writing down all my jumbled feelings, eventually I will learn to organize them. Even if this means sacrificing grammar, eloquence and structure. After all, if no one is reading this shit who really cares?

Moving on, let’s talk about cheddar biscuits. These biscuits are good. Cheesy, buttery, light and tender, good. Especially straight out of the oven? Oh man, it was hard not to eat all of them, although I did a good job gobbling down three of them in a row, all without pause. The cheddar is strewn throughout but never overpowers the biscuit, and the dough is tender and soft. For the next few days, my mom and I kept eating them as breakfast, as lunch sandwiches, as snacks – basically in any way we could create an excuse for. And the visual testimony to how good they are? The visible flecks of butter studded across the dough.

IMG_0191

Yeah, it’s that kind of recipe. Enjoy.

Cheddar Biscuits

Recipe adapted from Food52 (found HERE)

Servings: 20 biscuits

Ingredients:
3 1/2 cups flour
2 tablespoons baking powder
2 1/2 teaspoons salt
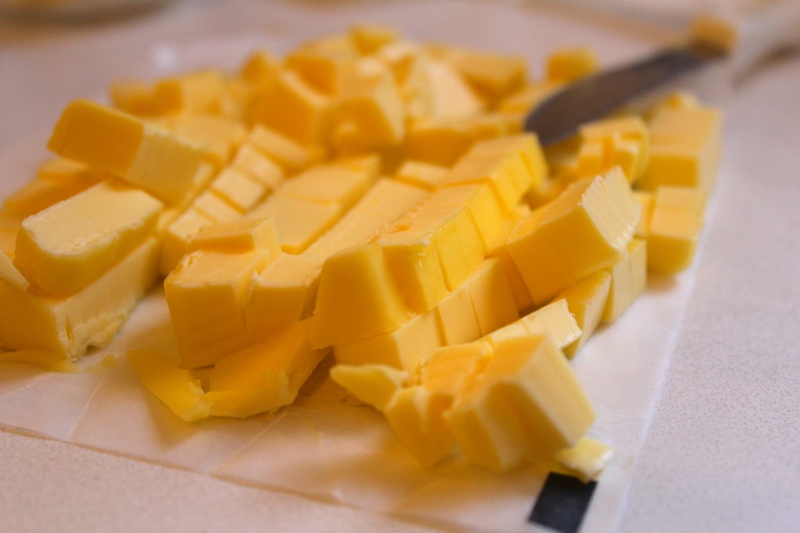
9 tablespoons cold unsalted butter
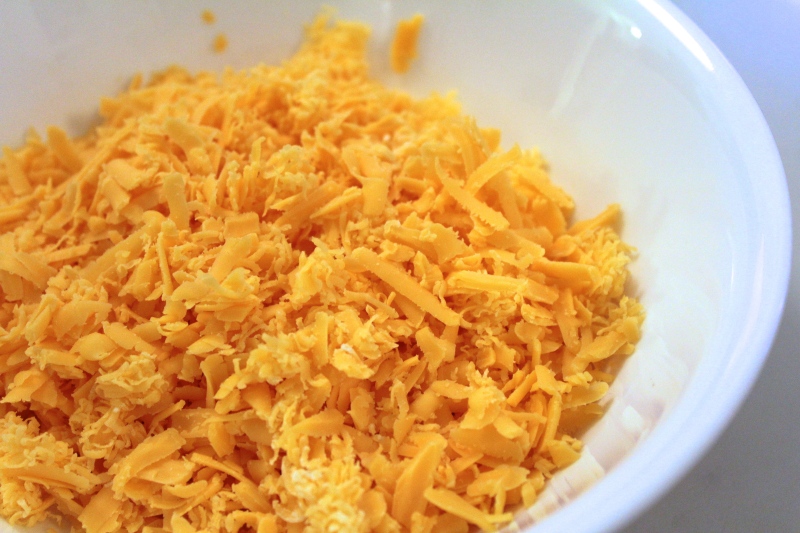
2 cups grated sharp cheddar cheese
1 3/4 cup buttermilk
1 large egg

Directions:

1. Mix together the flour, baking powder and salt in a bowl. Stick it in the fridge for 20 minutes. While waiting, cut the butter into small chunks and let them warm to room temperature.

IMG_0186

2. Combine the dry ingredients, the cheese and butter in the bowl and mix until the chunks of butter are no bigger than pea-sized. If you have a standing mixer, do this in the mixer bowl on low speed until you achieve the same results.

IMG_0183

IMG_0187

3. Add the buttermilk and mix (on low) until the dough just comes together – don’t over mix. Transfer the dough onto a floured board, flour your hands and knead it lightly a few times. Then pat the dough into a large rectangle about 1/2 inch thick.

IMG_0190

4. Preheat the oven to 400 degrees. Then, use a 3-inch round cutter or simply use a cup, dip whichever you are using (I used a cup) into flour and then cut the biscuits. According to the original recipe you’re not supposed to twist the cutter or cup but I did.

IMG_0194

5. After cutting out the first batch, pat together the remaining dough into another 1/2 inch thick shape and cut more. Throw away the leftover bits or use them – the recipe advises against a third shaping which will make the biscuits tough.

6. Beat the egg with a small splash of water and brush the tops of the biscuits with the egg wash.

7. Bake the biscuits for 20 minuteson baking sheets lined with parchment paper, rotating them halfway through. Serve them warm (or I enjoyed them still piping hot and steaming).

IMG_0198

IMG_0205

Bacon Wrapped Dates

IMG_4701

Readers, sometimes I eat simply to pass time. Sometimes to console myself from stress or emotional turmoil, other times as an excuse to hang out with friends. Most of the time, I just eat because the food tastes good…that’s a good enough reason, right? Right???

Ah, well, there goes my healthy diet. At least with these bacon wrapped dates, I can say I was taste-testing for holiday parties coming up ahead. As far these little gems are concerned, that’s a more than good enough reason for stuffing my face with them by myself making a mini-preview batch. They’re so easy they totally debunk the idea of “x amount of effort = x amount of reward.” With minimal effort and big reward, the proportions are skewed in all the best ways. Make ’em. Stuff them with goat cheese and a whole roasted almond, or blue cheese, or maybe even some pimento cheese. I simply made a chipotle-sriracha-mayo dipping sauce and was satisfied.

Bacon Wrapped Dates

Servings: 10 bacon wrapped dates

Ingredients:
10 dried dates, pitted (easily found at an Asian supermarket)
5 strips of bacon

Directions:

1.De-pit all of your dates, meaning snip a vertical cut into the flesh of your date and take out the pit in the center.
2. Cut all of your strips of bacon in half, horizontally, to make ten smaller strips.
3. Wrap each date with a single half-strip. Tuck one end of the bacon strip over the other and then skewer through with a toothpick to hold everything together, making sure to go through both ends of the bacon so it snugly wraps the date without falling apart. If you don’t have toothpicks, which I didn’t have either, simply place the bacon-wrapped dates down on the loose ends tucked under each other so the whole thing stays together in the oven. While the bacon bakes, it will bake into shape around the date.

IMG_4683

4. Bake for 20-30 minutes in a 350°F oven. Let cool for a bit and enjoy!

IMG_4694

Chipote-Sriracha-Mayo Dipping Sauce

Ingredients:
Chipotle Cholula Hot Sauce
Sriracha Hot Sauce
1 1/2 tablespoon mayonnaise

Directions:
Mix together mayonnaise, Sriracha and Cholula to taste. I probably used about 2 teaspoons of the hot sauces each.

A Quick Lunch, Miso-Soy Marinated Fried Tofu

IMG_4881

When it’s finals week, it becomes easy to forget your basic needs and difficult to peel away from the books – at least, during the 24-hour countdown before an exam. Sometimes, though, you have to remember to feed yourself. I mean, you should generally always remember, but I’m talking about during those last hours when all you want to do is cram as much knowledge into your brain before heading out to face the enemy your final exam. So when it finally hits you that all you’ve had for the past few days is shit food, red bull and one too many 5-hour ENERGY shots, take a lunch break. Come on now, I promise it’ll only take twenty minutes, and you know you deserve it.

This marinated tofu dish only requires you to cube up tofu, toss it with some sauces and garlic, and fry it all up in a pan. The sugar and honey will caramelize into crispy, sweet edges that are counterbalanced by the salt in the soy and miso and acidity from the vinegar. It’s easy, it’s quick, it’ll tide you over until you’re done studying. I tweaked a recipe from Food 52 according to the ingredients that I had at home, but feel free to follow the original, I’m sure it’s even more delicious (found HERE).

Miso-Soy Marinated Fried Tofu 

Ingredients: 
*You can really eyeball these measurements to the proportions you prefer

1 pound of tofu, cubed (my package was actually only 15.5 oz)
1/4 cup miso paste
3 tablespoons soy sauce
2-3 tablespoons sesame oil
2-3 tablespoons apple cider vinegar
2-3 tablespoons brown sugar
2-3 tablespoons honey
3 cloves of garlic, minced
A large pinch of Korean red pepper powder

Directions:

1. Dry off your block of tofu with paper towels, pressing very gently as to not crumble the tofu. Then cube.

2. Mix together all the ingredients for marinade in a bowl. Then toss in the tofu and mix thoroughly.

3. Keep pouring the marinade pooled at the bottom of the bowl over the top of the tofu with a spoon to coat well.

IMG_4858

4. Heat up a little vegetable oil in a frying pan and fry the cubes of tofu on each side until nicely browned. I also poured over the rest of the marinade in the bowl as it was frying. It does splatter and it fries up pretty quickly so don’t leave the pan unattended.

5. Serve hot with a few slivers of dried seaweed (nori) sprinkled on top or use it in a salad or stir-fry…any way you really want.

IMG_4880

Pajeon (Korean Scallion Pancakes)

When your mom already cooks the best Korean food you could ask for, and every day at that, you quickly learn to leave that stuff up to her. The results of this: I can make crêpes, chocolate soufflés, and an array of pastas, but I only learned to make rice a few months ago. Shameful? A little bit, yes. But this utter lack of knowledge in Korean cooking is what makes living off-campus so exciting. What foods I used to regard as mysterious, something that just magically appeared on my dinner table without me asking, are slowly starting to become part of my everyday meals.

For starters, I bring you pajeon, a Korean scallion pancake, made with flour, water, soybean paste and scallions, that you serve with a soy sauce-based dipping sauce. When I’m low on time, I whip this up in a quick 15 minutes for the perfect single-person weeknight meal. The recipe is open to other additions like red chili peppers and vegetables but I like to keep it simple.

Pajeon (Korean Scallion Pancakes)

Servings: 1

Ingredients:

1/2 cup flour
3/4 cup water
1 teaspoon sugar
1 teaspoon soybean paste (dwenjang in Korean)
2 large scallions, sliced into thin strips

Directions:

1. Mix together the flour, water, sugar and soybean paste.

2. Heat up a pan with a little oil. Fry the scallions until they’re cooked through and soft, maybe even a little crispy around the edges.

3. Pour the batter evenly on top and spread it around a little. Cook until the bottom is crispy, then flip and cook the other side.

4. Serve with a sauce made with 2 tablespoons soy sauce, 1 tablespoon white vinegar (or I used apple cider vinegar), a teeny pinch of sugar, chopped scallions, chopped red chili peppers and a big pinch of roasted sesame seeds. If you don’t have these ingredients, a simple soy sauce and vinegar mix is fine too.

Chicken Noodle Soup for the Soul

I’ve caught the classic college student cold. The kind that stays with you for weeks and weeks, refusing to leave and insisting on making your life miserable. It’s like a bad house guest that overstays his welcome, except not by just a few extra days but a few very long months. You never should’ve let it come over, but you were careless and too busy to care. Long before you knew it, it settled in your apartment, leaving your trash can filled with tissues and depleting your supply of tea.

The only method I know of eliminating this pesky dilemma: homemade chicken noodle soup. It turns out there might be a legitimate science behind this mom’s favorite that shows chicken soup actually helps reduce upper respiratory cold symptoms. This happens by inhibiting the bodily migration of neutrophils, the most common infection-fighting white blood cells. The soup also helps increase the movement of nasal mucus and improves the function of protective cilia in your nose that prevent bacteria from entering. So the rumors are true, this stuff helps you get, or at least feel, better. Lucky for us sniffly, coughing students, chicken noodle soup is incredibly easy to make, especially if you already have some leftover chicken in the fridge like I did. Then, all you need is chicken stock, pasta and some basic vegetables before you have a cold cure-all waiting on your dinner table.

*I changed the ingredient proportions for this recipe, so photos below show a lesser broth to soup content ratio than this recipe will yield)

Serving Size: 2

Ingredients:

1/2 cup of any pasta, I used vegetable rotini
1/2 red bell pepper, diced (can replace with sweet potatoes, parsnips or turnips)
2 celery stalks, sliced
1 carrot, sliced
1/2 onion, diced
2 14.5 oz cans of chicken broth
1/2 cup of water
1 cup of shredded chicken breast (I used dark meat and it was fine)
Water for cooking pasta

Directions:

1. Boil pot of water and cook pasta until al dente. Drain and set aside.

2. Heat up chicken broth and water to a boil in medium pot and throw in carrots and chicken.

3. When carrots are starting to soften, lower heat to a simmer and throw in onions and red bell pepper. If using celery, this would be the time to add that too.

4. I had excess arugula in the fridge so I threw that in during the last minute after all the vegetables had become tender. While the arugula was cooking in and wilting, I tasted for salt and pepper. If the broth has reduced down too much, or it is too salty, add in 1/8 cup of water at a time until everything has adjusted to your taste. Add in pasta and simmer for another minute.

All the goodies simmering in the pot.

5. Serve and feel the icky sickness melt away.

Four Things.

{Finding old childhood photos while packing for school}

This week I finally arrived in Evanston to start my junior year at Northwestern. I’ve moved into my new apartment (good riddance, campus dorm life) and it’s huge! Four bedrooms, a dining room, living room and a sunroom, huge! If only it was fully furnished…then it would look like people actually lived here. But we’ve got our basic furniture and the small things will come eventually. With some reunions with friends underway and the first day of class on Thursday, I’m totally stoked for the new year.

{Flying out to Chicago, and discovering a new love for Southwest Airlines – it really is the best airline out there}

{Discovering good cheap wines}

{The only real decoration in my new apartment room so far – a canvas print from a NY street market}